|
Advanced Slabbing
|
 |
|
STEP 1
|
| This is the preform shaping for abeveled edge. Prior to grinding, use glastec machine with wood wedge or handheld grinding beveling maneuver. Grind to just outside scribe mark at nominal 15 degree angle with back of preform now smaller than the front. This fits jewelry findings better and reduces chipping of edge of preform during grinding. |
|
STEP 2
|
| If more than one slab of a rock is desired, determine orientation of the cuts if rock is relatively flat 90 degrees to cut. A wooden 2x2, 2x4, 2x6, etc, nominally 6" long should be glued to the rock. Use carpenters wood glue for this attachment. Support the wood in upright position with rock on top. Weight of rock provides the pressure for the joint bonding. After glue is dry check for total adhesion. The wood member now serves as a vise friendly alignment to shape, rather than an irregular rock. The combination can now be readily shifted in the vise, removed and reset at some future date and alignment, with first cut assured. This allows you to cut the entire rock into multiple slices. Mark the wood member on the top side, when in vise, to assure correct positioning, to use at later date when re-installed in vise. Use a permanent marker, small nail. etc. |
|
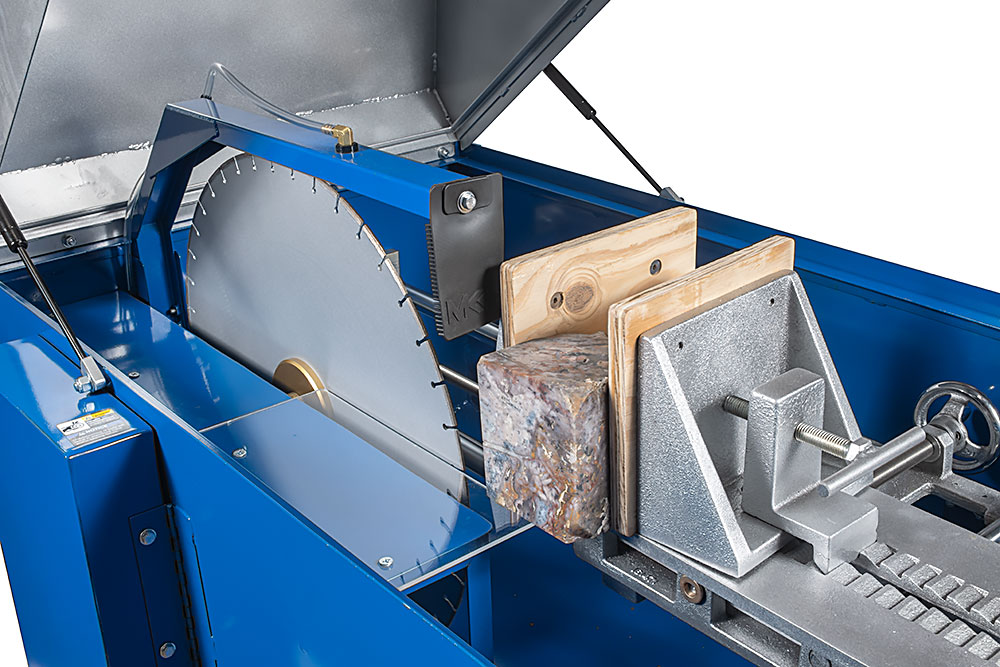
STEP 3
|
| Now, for positioning into carriage, back vise into its farthest travel from blade. Set rock/timber into vise rotating for best non-tilt, non-roll position and best low height against saw face. Move carriage forward so that rock is now up against the side of the blade. Adjust in-out travel of cross feed on vise to achieve maximum slicing of stone without rock being to far overhung from the vise. This would cause undue pressure on glue joint and could cause separation of rock and timber. Remember, you now have an alignment tool that allows you to reposition rock for additional parallel cuts. If rock interferes with sides of the vise, add small lengths of 2x4 along side of glued wood member so that rock is somewhat within vise area. This allows tightening against wood and not rock. Once you have the rock assembly in position, tighten vise securely. Check to insure that rock hasn't tilted inward towards blade. Remember, there will be a lot of pressure against rock by the blade as it starts to cut, which might break glue joint. You may need to reglue with more glue. If this is not an option, cut rock first with the rock secured within vise. |
|
STEP 4
|
| When finished, wash rock thoroughly in dawn detergent & water to remove all cutting oil. Then glue wood member, about same size as rock to the sliced, to the side of rock. Support it in an upright position, with rock at top providing weight on glue joint. You can even make the final slice by cutting with a hand saw or coping saw. Soak in hot water to loosed glue bond. Any wood glue remaining can easily be cut with a sharp knife, filed away with a fine grade file, ground off or left on the back of the slice if it is to be covered up within your jewelry. |